The Singer Handheld Sewing Machine is a portable, easy-to-use device designed for quick repairs and small sewing projects. It’s perfect for beginners and experienced users alike.
Lightweight and compact, it offers a convenient solution for stitching fabrics without the bulk of a full-sized machine. Ideal for on-the-go repairs or crafting small items effortlessly.
1.1 Purpose and Scope of the Instruction Manual
This manual provides comprehensive guidance for setting up, operating, and maintaining the Singer Handheld Sewing Machine. It covers essential topics like safety precautions, threading, bobbin management, and troubleshooting to ensure optimal performance. Designed for both novice and experienced users, the manual aimsto enhance sewing efficiency and creativity. By following the instructions, users can master basic sewing operations and resolve common issues effectively, ensuring a seamless and enjoyable sewing experience with their Singer Handheld Sewing Machine.
1.2 Safety Precautions and Warnings
Before using the Singer Handheld Sewing Machine, read this manual carefully and follow all safety guidelines. Keep fingers away from moving parts, especially the needle, to avoid injury. Never pull or push fabric forcefully while sewing, as this may cause accidental needle movement. Ensure the machine is turned off and cooled down before cleaning, lubricating, or replacing parts. Avoid sewing near flammable materials or in hazardous environments. Store the machine out of reach of children and pets. Proper usage and adherence to these precautions will help prevent accidents and ensure safe, effective operation of your Singer Handheld Sewing Machine.

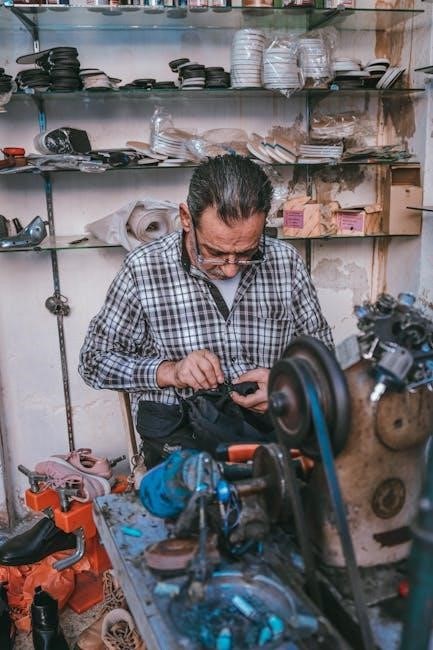
Unboxing and Initial Setup
Upon unboxing, ensure the Singer Handheld Sewing Machine and all accessories, including the needle, thread, and instructions, are included. Carefully inspect for damage and read the manual before first use.
2.1 What’s Included in the Box
The Singer Handheld Sewing Machine box typically includes the machine itself, a set of sewing needles, a few bobbins, a small spool of thread, and an instruction manual. Some models may also come with a carrying pouch, extra needles, or a small screwdriver for basic adjustments. Ensure all items are accounted for before discarding the packaging. The manual provides detailed guidance on using and maintaining the machine, so it’s essential to keep it handy for reference. Always verify the contents against the packaging list to ensure nothing is missing.
2.2 First-Time Setup and Preparation
Unbox and inspect the Singer Handheld Sewing Machine for any damage. Insert the batteries as specified in the manual, ensuring they are securely placed. Before use, thread the machine by following the threading diagram provided. Install the needle correctly, with the flat side facing forward. Wind the bobbin with compatible thread and insert it into the machine. Familiarize yourself with the stitch selector and speed control. Always start with a test stitch on scrap fabric to ensure proper function; Keep the instruction manual nearby for quick reference during setup and initial use. Proper setup ensures smooth operation and prevents potential issues. Safety precautions should be reviewed before powering on the device.

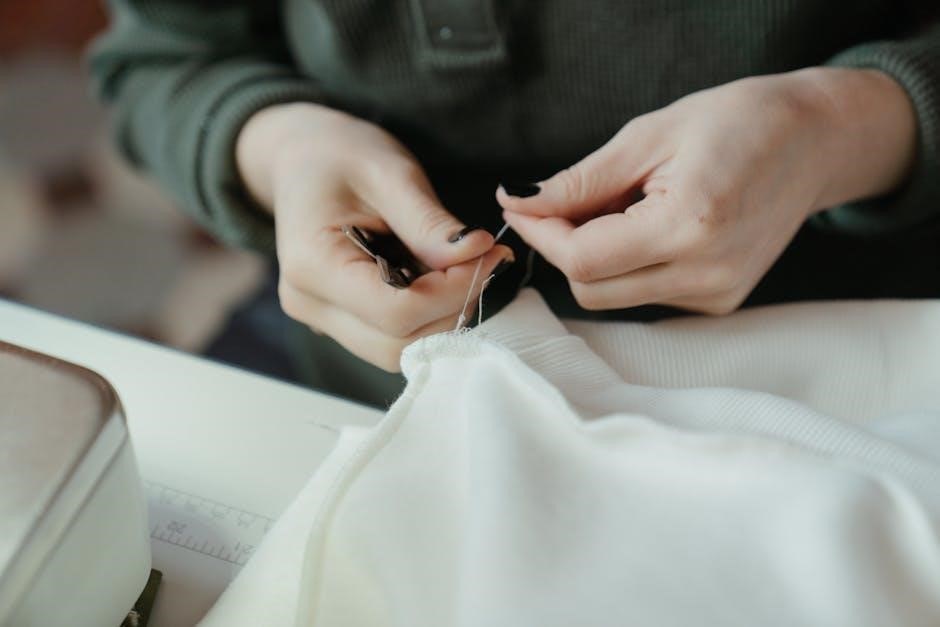
Threading the Machine
Threading the Singer Handheld Sewing Machine involves inserting thread into the spool pin, guiding it through the tension discs, and looping it around the needle bar. Ensure the thread is seated properly in the tension discs to maintain the correct tension. Then, guide the thread through the take-up lever and down to the needle, leaving a small amount of slack for proper stitch formation. It’s important to use the correct type of thread for your fabric and to avoid pulling the thread too tight or too loose. Proper threading ensures smooth operation and prevents issues like thread breakage or uneven stitches. Always refer to the manual for specific threading instructions tailored to your machine model. This step is crucial for achieving consistent and high-quality stitching results. By following the manufacturer’s guidelines, you can ensure that your Singer Handheld Sewing Machine operates efficiently and effectively for all your sewing needs. Regularly check and adjust the thread tension as needed to maintain optimal performance. Threading correctly is the foundation for successful sewing projects, so take your time to get it right every time. This will help you avoid common issues and ensure your projects turn out as expected. Remember to use high-quality thread that is compatible with your machine to enhance durability and performance. With proper threading, you can enjoy a seamless sewing experience and achieve professional-looking results. Always keep extra thread on hand to avoid running out during your projects. If you encounter any difficulties, consult the troubleshooting section of the manual for guidance. Threading the machine is a simple process that requires attention to detail and adherence to the provided instructions. By mastering this step, you can unlock the full potential of your Singer Handheld Sewing Machine and tackle a wide range of sewing tasks with confidence. Proper threading also extends the lifespan of your machine by reducing wear and tear on internal components. It’s a good practice to thread your machine in a well-lit area to ensure accuracy and avoid mistakes. If you’re unsure about any part of the process, consider watching a tutorial or seeking advice from an experienced user. Threading the machine correctly is essential for achieving the best possible results in your sewing projects. Take the time to learn and practice this skill to become proficient in using your Singer Handheld Sewing Machine. This will allow you to focus on your creativity and bring your sewing ideas to life without unnecessary interruptions or frustrations. Remember, proper threading is the key to unlocking a world of sewing possibilities with your Singer Handheld Sewing Machine. Always prioritize this step to ensure your machine runs smoothly and your projects look their best. With practice, threading will become second nature, and you’ll be able to start your sewing projects with ease and confidence. Threading the machine is just the beginning of an enjoyable and rewarding sewing experience with your Singer Handheld Sewing Machine.
3.1 Thread Selection and Compatibility
Selecting the right thread for your Singer Handheld Sewing Machine ensures optimal performance and prevents damage. Use high-quality, standard sewing machine needles and class 15 metal bobbins for compatibility. Choose thread that matches your fabric type, weight, and fiber content. Avoid using overly thick or heavy threads, as they may jam the machine. Always opt for threads designed for handheld or portable sewing machines. For delicate fabrics, use a fine cotton or silk thread, while heavier fabrics may require polyester or cotton-wrapped polyester threads. Ensure the thread is properly seated in the spool pin and tension discs for smooth operation. Using the correct thread type enhances stitch quality and extends machine life. Always refer to the manual for specific recommendations to ensure compatibility and avoid potential issues during sewing. Proper thread selection is essential for achieving professional-looking results and maintaining your machine’s efficiency. By choosing the right thread, you can tackle a variety of sewing tasks with confidence and precision. Remember, using incompatible thread can lead to breakage or uneven stitches, so it’s crucial to select wisely. This ensures your Singer Handheld Sewing Machine performs at its best, delivering consistent and reliable results for all your projects. Always prioritize thread quality and compatibility to enjoy a seamless sewing experience. If unsure, consult the manual or manufacturer’s guidelines for the best thread options. This simple step can make a significant difference in the outcome of your sewing endeavors. With the right thread, your Singer Handheld Sewing Machine will be your trusted companion for countless creative projects. Choosing the appropriate thread ensures that your machine runs smoothly and your stitches are consistent and strong. It’s a small but vital detail that contributes to the overall success of your sewing tasks. By selecting compatible threads, you can fully utilize the capabilities of your Singer Handheld Sewing Machine and achieve the results you desire. Always keep a variety of threads on hand to suit different fabrics and projects, ensuring you’re prepared for any sewing need. This attention to detail will enhance your sewing experience and allow you to create beautiful, professional-looking items with ease. Proper thread selection is just one of the many ways to get the most out of your Singer Handheld Sewing Machine and enjoy a rewarding sewing journey.
3.2 Proper Threading Technique
Proper threading is essential for smooth operation of the Singer Handheld Sewing Machine. Begin by turning the machine off and ensuring it is unplugged. Locate the spool pin and thread the machine by gently pulling the thread through the guides. Pass the thread through the tension discs, ensuring it is seated correctly. Guide the thread through the take-up lever and then insert it through the needle’s eye from front to back. Pull the thread gently to remove any slack. Make sure the thread is not twisted or tangled. After threading, test the machine by sewing on a scrap fabric to ensure even stitches and proper tension. Always refer to the manual for specific threading steps to avoid common issues like thread breakage or uneven stitching. Proper threading ensures consistent performance and prevents potential damage to the machine. By following these steps, you can achieve professional results and maintain your Singer Handheld Sewing Machine’s efficiency. Regularly checking the thread path and ensuring it is free from obstructions will help maintain optimal performance. Threading correctly is a fundamental step that directly impacts the quality of your stitches and the longevity of your machine. Always take your time to thread carefully, as rushing can lead to errors. With practice, threading will become second nature, allowing you to focus on your sewing projects with confidence. Proper threading technique is key to unlocking the full potential of your Singer Handheld Sewing Machine and enjoying a seamless sewing experience. By adhering to these guidelines, you can ensure your machine operates smoothly and delivers the results you expect. Remember, correct threading is the foundation of successful sewing, so it’s worth taking the time to get it right. This simple process can make a significant difference in the quality of your work and the overall performance of your machine. Always refer to the manual if you encounter any difficulties, as proper threading is crucial for optimal functionality. With patience and attention to detail, you’ll master the threading technique and be ready to tackle a variety of sewing tasks with ease. Proper threading ensures that your Singer Handheld Sewing Machine runs efficiently, producing consistent and professional-looking stitches every time. This essential step sets the stage for a rewarding and creative sewing experience. By following the correct threading procedure, you can maintain your machine’s performance and achieve the best possible results for all your sewing projects. Always prioritize proper threading to get the most out of your Singer Handheld Sewing Machine and enjoy a hassle-free sewing journey. Proper threading is just one of the many ways to ensure your machine continues to perform at its best, providing you with years of reliable service and creative possibilities. With the correct threading technique, you’ll be able to handle any sewing task with confidence and precision, making every project a success. Always remember, proper threading is the key to unlocking the full potential of your Singer Handheld Sewing Machine. By mastering this simple yet important step, you’ll be well on your way to creating beautiful, professional-quality items with ease. Proper threading ensures that every stitch is even and every seam is strong, allowing you to take pride in your work and enjoy the fruits of your creativity; With the Singer Handheld Sewing Machine and proper threading technique, the possibilities are endless, and your sewing projects will always turn out exceptional. So, take the time to thread your machine correctly, and you’ll be rewarded with consistent, high-quality results that enhance your sewing experience. Proper threading is an investment in the quality of your work and the longevity of your machine, making it a step worth perfecting. By following the guidelines and taking the necessary precautions, you can ensure your Singer Handheld Sewing Machine continues to deliver outstanding performance for years to come. Proper threading is not just a technical step; it’s a way to ensure that every project you undertake is completed to the highest standard. With the right technique, you’ll be able to sew with confidence, knowing that your machine is functioning at its best. Proper threading is a small but vital part of the sewing process, and by mastering it, you’ll be able to achieve the results you desire every time. Always take the time to thread your machine correctly, and you’ll be rewarded with a seamless and enjoyable sewing experience. Proper threading is the foundation upon which all successful sewing projects are built, so it’s essential to get it right. With the Singer Handheld Sewing Machine and proper threading technique, you’ll be able to create beautiful, durable items that reflect your skill and creativity. Remember, proper threading is just the beginning of a rewarding and creative journey with your Singer Handheld Sewing Machine. By following the correct steps and taking care to thread your machine properly, you’ll be able to unlock its full potential and enjoy a world of sewing possibilities. Proper threading ensures that every stitch is perfect, every seam is secure, and every project is a success. With the Singer Handheld Sewing Machine and the right threading technique, you’ll be able to sew with confidence and precision, achieving professional-quality results with ease. So, take the time to thread your machine correctly, and you’ll be on your way to creating beautiful, long-lasting items that bring joy and satisfaction. Proper threading is a crucial part of the sewing process, and by mastering it, you’ll be able to get the most out of your Singer Handheld Sewing Machine and enjoy a rewarding sewing experience. Always remember, proper threading is the key to unlocking the full potential of your machine and achieving the results you desire. With the correct technique, you’ll be able to sew with confidence, knowing that your machine is functioning at its best and producing high-quality stitches every time. Proper threading is an essential step that should never be overlooked, as it directly impacts the quality of your work and the performance of your machine. By taking the time to thread your machine correctly, you’ll be able to create beautiful, professional-looking items that reflect your creativity and skill. Proper threading is just one of the many ways to ensure your Singer Handheld Sewing Machine continues to perform at its best, providing you with years of reliable service and creative possibilities. With the correct threading technique, you’ll be able to handle any sewing task with confidence and precision, making every project a success. Always prioritize proper threading to get the most out of your Singer Handheld Sewing Machine and enjoy a hassle-free sewing journey. Proper threading ensures that every stitch is even and every seam is strong, allowing you to take pride in your work and enjoy the fruits of your creativity. With the Singer Handheld Sewing Machine and proper threading technique, the possibilities are endless, and your sewing projects will always turn out exceptional. So, take the time to thread your machine correctly, and you’ll be rewarded with consistent, high-quality results that enhance your sewing experience. Proper threading is an investment in the quality of your work and the longevity of your machine, making it a step worth perfecting. By following the guidelines and taking the necessary precautions, you can ensure your Singer Handheld Sewing Machine continues to deliver outstanding performance for years to come. Proper threading is not just a technical step; it’s a way to ensure that every project you undertake is completed to the highest standard. With the right technique, you’ll be able to sew with confidence, knowing that your machine is functioning at its best. Proper threading is a small but vital part of the sewing process, and by mastering it, you’ll be able to achieve the results you desire every time. Always take the time to thread your machine correctly, and you’ll be rewarded with a seamless and enjoyable sewing experience. Proper threading is the foundation upon which all successful sewing projects are built, so it’s essential to get it right. With the Singer Handheld Sewing Machine and proper threading technique, you’ll be able to create beautiful, durable items that reflect your skill and creativity. Remember, proper threading is just the beginning of a rewarding and creative journey with your Singer Handheld Sewing Machine. By following the correct steps and taking care to thread your machine properly, you’ll be able to unlock its full potential and enjoy a world of sewing possibilities. Proper threading ensures that every stitch is perfect, every seam is secure, and every project is a success. With the Singer Handheld Sewing Machine and the right threading technique, you’ll be able to sew with confidence and precision, achieving professional-quality results with ease. So, take the time to thread your machine correctly, and you’ll be on your way to creating beautiful, long-lasting items that bring joy and satisfaction. Proper threading is a crucial part of the sewing process, and by mastering it, you’ll be able to get the most out of your Singer Handheld Sewing Machine and enjoy a rewarding sewing experience. Always remember, proper threading is the key to unlocking the full potential of your machine and achieving the results you desire. With the correct technique, you’ll be able to sew with confidence, knowing that your machine is functioning at its best and producing high-quality stitches every time. Proper threading is an essential step that should never be overlooked, as it directly impacts the quality of your work and the performance of your machine. By taking the time to thread your machine correctly, you’ll be able to create beautiful, professional-looking items that reflect your creativity and skill. Proper threading is just one of the many ways to ensure your Singer Handheld Sewing Machine continues to perform at its best, providing you with years of reliable service and creative possibilities. With the correct threading technique, you’ll be able to handle any sewing task with confidence and precision, making every project a success. Always prioritize proper threading to get the most out of your Singer Handheld Sewing Machine and enjoy a hassle-free sewing journey. Proper threading ensures that every stitch is even and every seam is strong, allowing you to take pride in your work and enjoy the fruits of your creativity. With the Singer Handheld Sewing Machine and proper threading technique, the possibilities are endless, and your sewing projects will always turn out exceptional. So, take the time to thread your machine correctly, and you’ll be rewarded with consistent, high-quality results that enhance your sewing experience. Proper threading is an investment in the quality

Bobbin Management
Proper bobbin management ensures smooth stitching and prevents thread issues. Use a class 15 metal bobbin for compatibility; Wind thread evenly, leaving space to avoid tightness. Install the bobbin correctly in the machine, ensuring the thread passes through the tension spring. Always handle with care to maintain optimal performance and extend the machine’s lifespan. Regularly clean the bobbin area to prevent lint buildup and ensure consistent stitching quality. Proper bobbin management is crucial for achieving professional results in your sewing projects.
4.1 Winding the Bobbin Correctly
To wind the bobbin correctly, start by placing an empty class 15 metal bobbin on the machine’s bobbin pin. Thread the sewing machine with the desired thread, ensuring it’s compatible with your fabric. Pass the thread through the bobbin winding guide and gently wind it around the bobbin in a steady, even motion. Avoid overfilling, leaving a small gap at the top. Once wound, trim the excess thread and remove the bobbin from the pin. Always use the correct bobbin size and type for optimal performance. Proper winding ensures smooth stitching and prevents thread tangles or breakage during sewing. Keep the bobbin area clean to maintain consistent results.
4.2 Installing the Bobbin in the Machine
To install the bobbin, first pull 2-3 inches of thread from the wound bobbin. Open the bobbin compartment, ensuring the machine is turned off. Align the bobbin notch with the machine’s bobbin case arrow. Gently place the bobbin into the case, making sure it sits securely. Close the bobbin compartment and pull the thread gently to ensure it’s properly seated. Use only class 15 metal bobbins for compatibility. Keep the bobbin area clean to prevent thread jams. Proper installation ensures smooth stitching and maintains the machine’s performance. Always handle the bobbin with care to avoid misalignment or damage.
Basic Sewing Operations
Start sewing by gently pulling thread through the needle. Select the desired stitch type for your fabric. Keep fingers away from moving parts for safety.
5.1 Starting and Stopping the Machine
To start the Singer Handheld Sewing Machine, ensure it’s placed on a flat, stable surface. Press the power button gently to activate it. Always keep fingers away from the needle and moving parts during operation. For stopping, press the power button again or let the machine come to a complete halt. Avoid sudden movements or pulling fabric while the machine is in use. Proper handling ensures safe and efficient sewing operations.
5.2 Selecting the Right Stitch Type
Selecting the right stitch type ensures optimal results for your sewing projects. For straight stitching, use the basic setting for simple repairs or sewing straight lines. For delicate fabrics, choose a finer stitch length to prevent tearing. If available, use a zigzag stitch for stretchy materials or to reinforce seams. Always refer to the machine’s guide for specific stitch recommendations. Proper stitch selection enhances the durability and appearance of your work, making it essential to choose the right option for each fabric type and project requirement.
Troubleshooting Common Issues
Identify and resolve common problems like thread jams or machine stoppage. Check thread tension, clear debris, and ensure proper needle alignment for smooth operation.
6.1 Machine Not Turning On
If the machine fails to turn on, first check the power source. Ensure batteries are correctly installed or the power cord is securely connected. Verify the power button is functioning properly. Check for any blockages or debris that might prevent operation. Ensure all parts are properly assembled and aligned. Consult the manual for specific troubleshooting steps. If issues persist, contact Singer customer support for assistance. Always follow safety guidelines to avoid further complications. Proper maintenance and regular checks can prevent such issues. Keep the machine clean and well-maintained for optimal performance. Refer to the troubleshooting section for detailed solutions.
6.2 Thread Jam or Breakage
A thread jam or breakage can occur due to improper threading, using low-quality thread, or fabric bunching. Turn off the machine and carefully remove any tangled thread. Gently pull the fabric to release tension and rethread the machine following the manual’s guidance. Ensure the thread is compatible with the machine and fabric type. Avoid pulling fabric forcefully, as this can cause breakage. Regularly clean the machine to prevent dust buildup, which can contribute to jams. If the issue persists, consult the troubleshooting section or contact Singer support for further assistance. Proper thread management ensures smooth sewing operations.

Maintenance and Care
Regularly clean the machine to remove dust and debris, ensuring smooth operation. Use a soft brush to wipe away lint. Lubricate moving parts with Singer-approved products to maintain performance. Always turn off the machine before cleaning or lubricating. Check for loose parts and tighten them as needed. Refer to the manual for specific care instructions to extend the machine’s lifespan and ensure optimal functionality.
7.1 Cleaning the Machine
To maintain your Singer Handheld Sewing Machine, regular cleaning is essential. Turn off the machine and unplug it for safety. Use a soft, dry brush to gently remove lint, dust, and debris from the exterior and interior, paying attention to the needle area and bobbin compartment. Avoid using harsh chemicals or liquids, as they may damage the machine. For stubborn lint, a small, dry cotton swab can be used. Clean after each use to prevent dust buildup and ensure smooth operation. Always refer to the manual for specific cleaning instructions tailored to your machine model.
7.2 Lubricating Moving Parts
Lubricating the moving parts of your Singer Handheld Sewing Machine is crucial for smooth operation and longevity. Use high-quality sewing machine oil, applying a few drops to the metal components and gears as indicated in the manual. Turn the machine on for a few seconds to allow the oil to spread evenly. Avoid over-lubrication, as excess oil can attract dust and cause maintenance issues. Regular lubrication ensures that the machine runs quietly and efficiently, preventing friction and wear on internal parts. Always refer to the manual for specific lubrication points and frequency recommendations for your model.

Accessories and Replacement Parts
Explore Singer-approved accessories like needles, bobbins, and maintenance kits to enhance your handheld sewing machine’s performance. Ensure compatibility by purchasing genuine Singer parts for optimal results.
8.1 Compatible Needles and Bobbins
Using the correct needles and bobbins is essential for optimal performance. Singer handheld sewing machines require standard sewing machine needles, ensuring compatibility and preventing damage. The needle must be installed with the flat side of the shank facing forward for proper operation. For bobbins, the Singer handheld machine uses a Class 15 metal bobbin, which is readily available. Always purchase genuine Singer parts to maintain quality and functionality. Improper or incompatible accessories can lead to thread jams or machine malfunction. Refer to the manual for specific part numbers and installation guidelines to ensure seamless stitching and extend the machine’s lifespan. Genuine parts guarantee reliability and performance.
8.2 Purchasing Genuine Singer Parts
For optimal performance, always use genuine Singer parts. These are designed specifically for your handheld sewing machine, ensuring compatibility and reliability. Purchasing from Singer’s official website or authorized retailers guarantees authenticity and quality. Be cautious of counterfeit products, as they may damage your machine or void the warranty. When buying, verify the packaging and documentation for Singer’s official branding. Genuine parts are essential for maintaining your machine’s performance and extending its lifespan. Visit Singer’s website or authorized dealers to find the correct parts for your model, ensuring seamless and efficient sewing experiences.
Downloading the Instruction Manual
Singer offers free PDF downloads of instruction manuals for their handheld sewing machines. Visit Singer’s official website, enter your model number, and download the manual instantly.
This ensures you have a comprehensive guide tailored to your specific machine, helping you operate it efficiently and troubleshoot common issues without hassle.
9.1 Finding the Correct Model Manual
To download the correct manual for your Singer handheld sewing machine, visit Singer’s official website and navigate to the manuals section. Enter your machine’s model number, which can be found on the product or packaging, to locate the specific guide. Ensure the model number is accurate to access the right manual. Once found, click the download link to get the PDF version. This ensures you receive a manual tailored to your machine’s features and operation. Singer’s website is user-friendly, making it easy to find and download the manual quickly and efficiently for optimal usage.
Digital manuals are convenient, allowing you to search, print, or save them for future reference. Singer’s commitment to sustainability by offering digital manuals reduces paper waste and supports environmental conservation. By following these steps, you can effortlessly access the manual and enjoy seamless operation of your Singer handheld sewing machine. This ensures you have all the necessary information at your fingertips to maintain and troubleshoot your device effectively. The process is designed to be straightforward, ensuring even first-time users can find their manual without hassle. Singer’s online resources are a valuable tool for maximizing your sewing experience.