
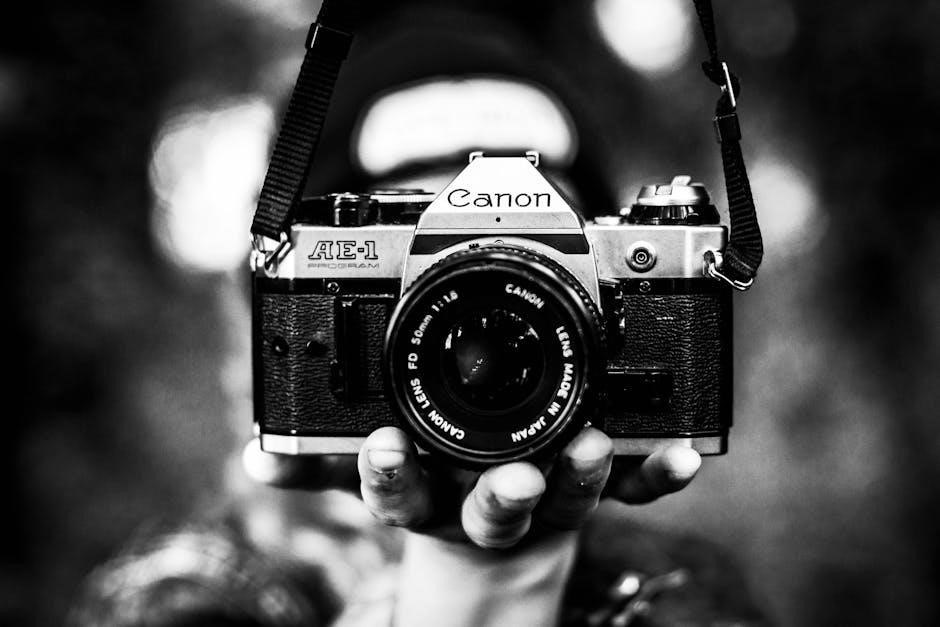
Canon AE-1 Instruction Manual: A Comprehensive Guide
This manual unlocks the full potential of your Canon AE-1, offering detailed instructions and examples for both beginners and experienced photographers.
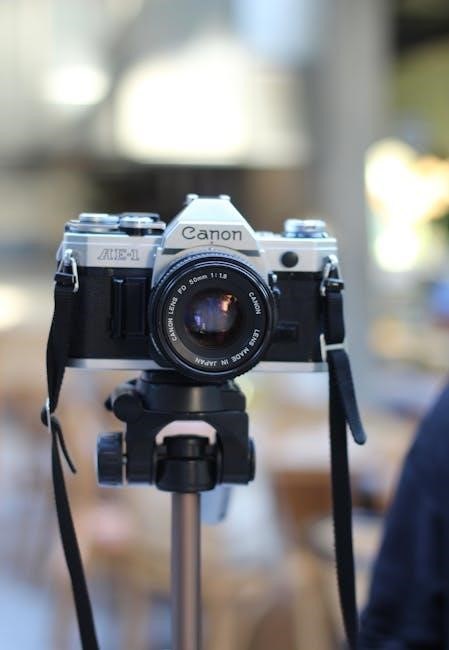
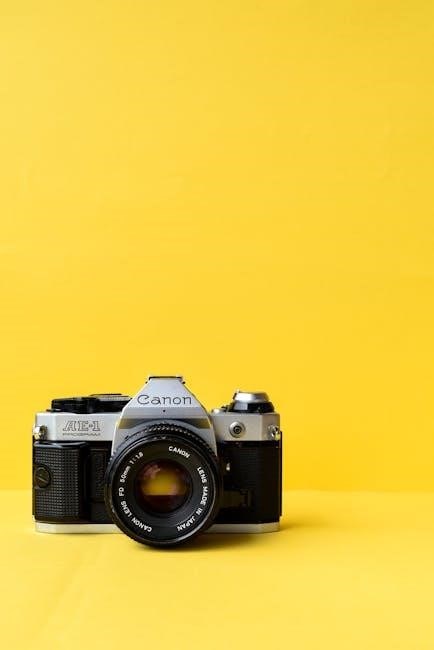
The Canon AE-1, released in 1976, revolutionized 35mm photography with its accessibility and advanced features. This camera, a cornerstone of photographic history, introduced shutter priority automation to a wider audience.
This guide provides a comprehensive exploration of the AE-1, covering everything from basic operation to advanced techniques. Whether you’re a novice or a seasoned photographer, this manual will help you master this iconic camera and unlock its creative potential. Prepare to embark on a journey into the world of film photography!
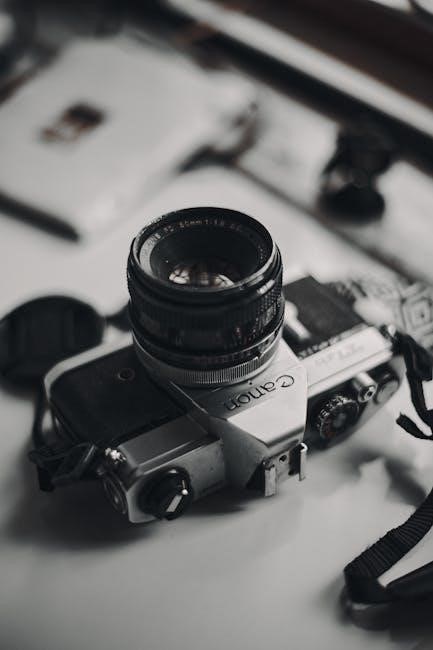
Understanding the Camera Body
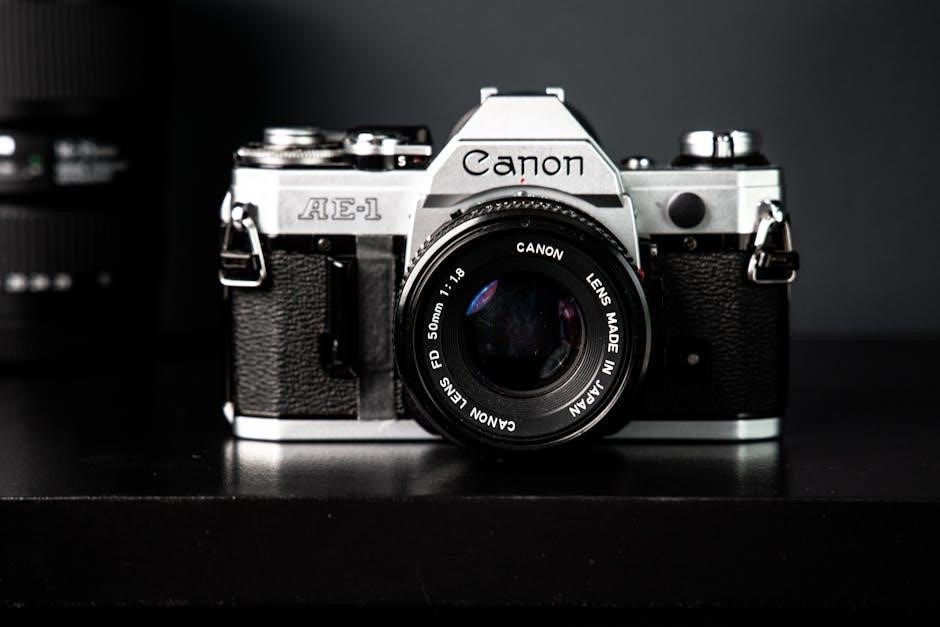
The Canon AE-1 boasts a robust and ergonomic design, prioritizing user comfort and accessibility. Key features include the shutter speed dial, aperture control, film advance lever, and rewind crank.
The top plate houses the exposure compensation dial and the shutter release button. The base of the camera contains the film chamber and battery compartment. Familiarizing yourself with these components is crucial for smooth operation and maximizing the camera’s capabilities.
Key Components and Their Functions
The shutter speed dial controls exposure time, ranging from 2 seconds to 1/1000th of a second. The aperture ring, on the lens, adjusts the lens opening, influencing depth of field.
The film advance lever moves film forward after each exposure, while the rewind crank retracts used film. The exposure compensation dial fine-tunes metering, and the self-timer initiates a delayed shutter release. Understanding each function unlocks creative control.

Film Loading and Unloading Procedure
To load film, open the back cover with the film release lever and insert the film canister. Thread the film leader to the take-up spool, advancing with the lever until snug. Close the back securely.
For unloading, press the film rewind button and turn the rewind crank to retract the film fully. Open the back and remove the canister. Proper loading ensures correct exposures and prevents damage.
Exposure Control: Aperture and Shutter Speed
The Canon AE-1 offers both manual and aperture-priority exposure control. Aperture controls depth of field, while shutter speed dictates motion blur. Understanding their interplay is crucial for creative control.
In aperture-priority mode, you select the f-stop, and the camera automatically sets the appropriate shutter speed. Manual mode allows full control over both settings, demanding precise metering and judgment for optimal results.
Aperture Priority Mode Explained
Canon AE-1’s Aperture Priority mode simplifies exposure by letting you choose the f-stop, controlling depth of field. The camera then automatically selects the correct shutter speed for proper exposure, indicated by the LED display.
Lower f-numbers (e.g., f/2.8) create shallow depth of field, ideal for portraits, while higher f-numbers (e.g., f/16) yield greater depth, suited for landscapes. This mode prioritizes creative control over focus.
Shutter Speed Settings and Their Effects
The Canon AE-1’s shutter speed controls the duration of light reaching the film, impacting motion depiction. Faster shutter speeds (e.g., 1/500s) freeze action, perfect for sports or wildlife. Slower speeds (e.g., 1/30s) blur motion, conveying a sense of movement.
Be mindful of camera shake with slower speeds; a tripod is recommended. The AE-1’s shutter speeds range from 2 seconds to 1/1000th of a second, offering versatility.
Focusing Techniques with the Canon AE-1
Achieving sharp images with the Canon AE-1 relies on mastering its focusing system. The split-image rangefinder in the viewfinder is crucial; align the divided image for precise focus. Practice makes perfect! Ensure your subject falls within the focusing points.
Consider depth of field – the area in acceptable focus – influenced by aperture. For landscapes, a smaller aperture (larger f-number) increases depth of field.
Using the Viewfinder for Accurate Focusing
The Canon AE-1’s viewfinder features a split-image rangefinder, essential for sharp focus. When properly aligned, the two sections merge, indicating critical focus on your subject. Practice observing this alignment; it’s quicker than relying solely on the focusing ring.
Pay attention to the microprism collar surrounding the split image – it blurs when out of focus, aiding quick adjustments. Consistent practice builds muscle memory!
Depth of Field and Its Control
Depth of field (DOF) dictates how much of your image appears acceptably sharp. A wider aperture (smaller f-number like f/2.8) creates shallow DOF, ideal for isolating subjects. Conversely, a narrower aperture (larger f-number like f/16) yields greater DOF, useful for landscapes.
The AE-1’s aperture ring directly controls DOF. Experiment to understand its impact on your images, balancing sharpness and creative blur.
Metering System: How it Works
The Canon AE-1 utilizes a center-weighted averaging metering system. This means it prioritizes the light in the center of the frame while still considering the surrounding areas. The camera assesses light and displays exposure suggestions via LED indicators in the viewfinder.
Understanding these LEDs is crucial for achieving correct exposure. They guide aperture and shutter speed adjustments for optimal results in various lighting conditions.
Understanding the LED Indicators
The AE-1’s viewfinder features LEDs (+/- and 0) indicating exposure levels. A “0” signifies correct exposure. “+” indicates overexposure, suggesting a smaller aperture or faster shutter speed. Conversely, “-” signals underexposure, requiring a wider aperture or slower shutter speed.
These LEDs don’t provide exact readings, but rather a guide. Mastering their interpretation is key to consistently capturing well-exposed photographs with your Canon AE-1.
Metering Modes and When to Use Them
The Canon AE-1 primarily utilizes center-weighted average metering. This prioritizes the light in the center of the frame, diminishing sensitivity towards the edges. It’s ideal for general photography, portraits, and scenes with even lighting.
For high-contrast situations, partial metering (using spot metering with an accessory) can be beneficial, focusing on a specific area for accurate exposure. Understanding these modes ensures optimal results.
Lenses Compatible with the Canon AE-1
The Canon AE-1 utilizes the Canon FD mount, a bayonet-style lens mount. Numerous Canon FD lenses were produced, offering a wide range of focal lengths and features. These lenses are specifically designed for optimal performance with AE-1 cameras;
Third-party lenses, also utilizing the FD mount, were available from manufacturers like Sigma and Vivitar, providing additional options and price points for photographers.
Canon FD Mount Lenses
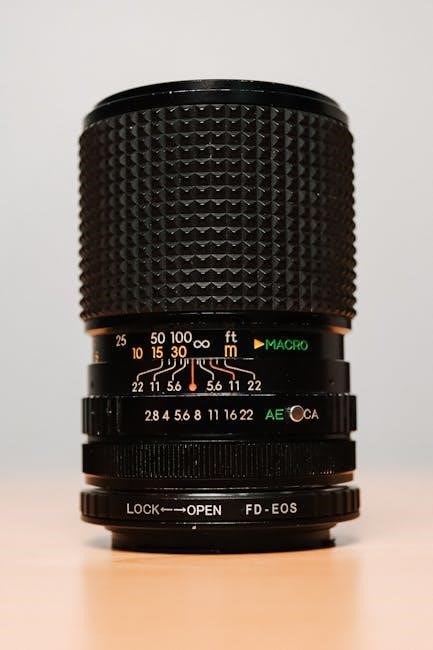
Canon FD lenses are renowned for their optical quality and build. They are categorized into several variations, including standard, new FD (with improved breech-lock mechanism), and FL (featuring floating elements for enhanced sharpness).
Common focal lengths range from wide-angle 20mm to telephoto 300mm or more, catering to diverse photographic needs. Many FD lenses offer excellent manual focus performance and pleasing bokeh.
Third-Party Lens Options
Beyond Canon’s FD lenses, several third-party manufacturers produced lenses for the AE-1’s FD mount. Notable brands include Tokina, Tamron, and Sigma, offering alternatives at various price points and specifications.
These lenses often provided competitive performance and expanded the available focal length range. Adapting these lenses can be a cost-effective way to explore different photographic styles with your AE-1.
Using Accessories with the AE-1
The Canon AE-1 system benefits greatly from available accessories, enhancing its versatility. External flash units, synchronized via the hot shoe or FP terminal, provide additional lighting control for various shooting scenarios.
Filters, like polarizing or UV filters, protect the lens and creatively modify images. Data backs allowed for recording exposure information directly onto the film, streamlining workflow.
External Flash Units and Synchronization
The Canon AE-1 offers versatile flash synchronization options; Utilizing the hot shoe provides a simple, direct connection for compatible flash units, enabling TTL (Through-The-Lens) metering for automatic exposure. For off-camera flash, the FP terminal allows synchronization at all shutter speeds, crucial for fill-flash and creative effects.
Ensure proper flash-to-camera settings for correct exposure and avoid dark bands caused by shutter speed limitations.
Filters and Their Applications
Filters significantly expand the creative possibilities with your Canon AE-1. UV filters protect the lens, while polarising filters reduce glare and enhance colours, particularly in landscapes. Neutral Density (ND) filters allow wider apertures or slower shutter speeds in bright light.
Colour filters create special effects, and graduated ND filters balance exposure in high-contrast scenes. Experiment to discover unique results!
Troubleshooting Common Issues
Encountering problems? Incorrect exposure often stems from improper metering or incorrect settings. If images are consistently dark, check the battery and ensure correct film speed selection. Focusing issues may arise from a dirty viewfinder or incorrect focusing technique.
A jammed film advance usually indicates improper loading. Consult the film loading section for assistance.
Exposure Problems and Solutions
Overexposed photos appear too bright; reduce aperture or increase shutter speed. Underexposed images are too dark – increase aperture or decrease shutter speed. Verify the LED indicators are correctly interpreting the scene’s light. A weak battery can cause inaccurate metering, leading to exposure errors.
Always double-check film speed settings for accurate results.
Focusing Difficulties and Remedies
If images are blurry, ensure proper focusing technique using the viewfinder’s split-image rangefinder. Check lens cleanliness; smudges affect clarity. Low light conditions make focusing harder; use a brighter light source if possible. Confirm the diopter adjustment on the viewfinder matches your eyesight.
Practice focusing on stationary objects to refine your technique.
Film Types and Selection
The Canon AE-1 is compatible with 35mm film, offering diverse creative options. Black and white film provides classic tones, while color negative film is versatile for everyday shooting. Slide film (positive) delivers vibrant, high-contrast images.
Film speed (ISO) impacts sensitivity; lower ISO for bright light, higher for low light.
Choosing the Right Film for Your Needs
Selecting the ideal film depends on your photographic vision and shooting conditions. For landscapes, a slower film (ISO 50-100) captures fine detail. Portraits benefit from medium speed (ISO 200-400) for pleasing skin tones.
Low-light situations demand faster films (ISO 800 or higher), accepting increased grain. Experiment to discover your preferred aesthetic!
Film Speed and Its Impact on Images
Film speed, measured in ISO, dictates sensitivity to light. Lower ISO films (50-100) require ample light, yielding finer grain and sharper images – ideal for static subjects. Higher ISO films (400+) excel in low light, but introduce noticeable grain.
Understanding this trade-off is crucial; faster films allow for quicker shutter speeds, minimizing blur.
Battery Information and Replacement
The Canon AE-1 utilizes a 4LR44 or equivalent 6V alkaline battery to power its electronic functions, including the LED metering system and the electromagnetic shutter. Battery life varies with usage.
To replace, open the battery compartment on the camera’s bottom. Ensure correct polarity when inserting the new battery. Regularly check the battery level for optimal performance.
Battery Type and Specifications
The Canon AE-1 requires a 6V alkaline battery, specifically a 4LR44, 4FR44, or equivalent. These batteries are commonly available in photography stores and online retailers. Avoid using rechargeable batteries unless specifically designed for camera use.
Ensure the battery meets the voltage requirement to prevent damage to the camera’s electronic components. A fresh battery provides accurate metering and reliable shutter operation.
Checking Battery Level
The Canon AE-1 features an LED indicator in the viewfinder to display the battery level. When the camera is switched on, the LED will illuminate. A bright illumination indicates sufficient power.
As the battery weakens, the LED will become dimmer. If the LED doesn’t light up, or is very faint, replace the battery immediately to ensure proper camera function and accurate exposure readings.
Self-Timer Function
The Canon AE-1’s self-timer allows for delayed shutter release, ideal for self-portraits or group photos. Activate it by sliding the self-timer lever, located near the shutter button, to the “B” or 10-second position.

Pressing the shutter button initiates a 10-second countdown, indicated by the blinking red LED in the viewfinder. The shutter releases automatically after the countdown completes, capturing your image.

How to Use the Self-Timer
To engage the self-timer, move the lever adjacent to the shutter release to either the ‘B’ (bulb) or 10-second delay setting. Ensure the camera is stable, as any movement during the countdown will affect image sharpness.
Press the shutter button fully; the red LED will blink, signaling the countdown. Compose your shot and quickly position yourself before the shutter fires automatically after ten seconds.
Applications of the Self-Timer
The self-timer is incredibly versatile! It’s perfect for group photos where you want to be in the picture, eliminating the need to ask a stranger for assistance.
Additionally, it’s useful for macro photography, minimizing camera shake when touching the shutter release. Landscape photographers can also utilize it for long exposures, avoiding vibrations during the capture process, resulting in sharper images.
Multiple Exposure Techniques
The Canon AE-1 allows for creative multiple exposures. After taking a picture, don’t advance the film; simply re-cock the shutter and take another. This overlays the second image onto the first on the same frame.
Experiment with ghostly effects, surreal compositions, or combining textures. Remember to use exposure compensation to avoid overexposure, as each image adds light to the final result.
Creating Multiple Exposures with the AE-1
To create multiple exposures on your Canon AE-1, first, take a picture. Crucially, do not advance the film. Then, press the shutter release again without winding the film forward. This superimposes the new image onto the previous one.
Repeat as desired, adjusting exposure accordingly. Utilize the rewind button to check progress. Practice is key to mastering this technique and achieving desired artistic effects.
Creative Possibilities with Multiple Exposures
Multiple exposures unlock a realm of artistic expression with the Canon AE-1. Combine silhouettes with landscapes, or blend portraits with textures for surreal effects. Experiment with motion blur during subsequent exposures to create ghostly trails.
Consider using neutral density filters to balance exposure. Explore layering different film types for unique color combinations. The possibilities are limited only by your imagination!
Maintenance and Care
Proper maintenance ensures your Canon AE-1’s longevity and optimal performance. Regularly clean the camera body with a soft, dry cloth, avoiding harsh chemicals. Use a blower to remove dust from the lens; gently wipe with lens paper if needed.
Store the camera in a cool, dry place, away from direct sunlight. Protect it from extreme temperatures and humidity. Periodic servicing by a qualified technician is recommended.
Cleaning the Camera Body and Lens
Keep your Canon AE-1 pristine with gentle cleaning practices. Use a soft, lint-free cloth to wipe the body, avoiding solvents. For the lens, employ a blower to remove loose dust first. If smudges remain, lightly clean with lens paper and a dedicated lens cleaning solution.
Never apply liquid directly to the camera or lens. Avoid excessive pressure during cleaning to prevent scratches.
Proper Storage of the Canon AE-1
Protect your investment with careful storage of your Canon AE-1. When not in use, store the camera in a cool, dry place, away from direct sunlight and extreme temperatures. A camera bag or case offers excellent protection against dust and accidental impacts.
Remove batteries for long-term storage to prevent corrosion. Avoid storing with lenses attached if possible, to reduce strain.
Advanced Features and Techniques
Elevate your photography with the Canon AE-1’s advanced capabilities. Explore portraiture utilizing depth of field control for beautiful bokeh. Master landscape photography by employing appropriate aperture settings for optimal sharpness and expansive views.
Experiment with multiple exposures to create surreal and artistic images. Understand how to effectively use external flash for creative lighting effects and fill shadows.
Using the AE-1 for Portrait Photography
Capture stunning portraits with the Canon AE-1 by prioritizing aperture control. Utilize wider apertures (like f/2.8 or f/4) to achieve a shallow depth of field, beautifully blurring the background and isolating your subject.
Focus precisely on the eyes for sharp detail. Consider using a reflector to bounce light and soften shadows, enhancing facial features. Experiment with different focal lengths for varied perspectives.
Landscape Photography with the Canon AE-1
Maximize landscape detail with the Canon AE-1 using smaller apertures (f/8 to f/16) for greater depth of field. This ensures sharpness from foreground to background, capturing expansive scenes effectively.
Employ a tripod for stability, especially in low light. Utilize the AE-1’s metering system to accurately expose for varying light conditions. Consider using filters, like polarizers, to enhance colors and reduce glare.
Understanding the Canon FD Mount
The Canon FD mount, utilized by the AE-1, is a breech-lock bayonet mount known for its robust construction and reliable connection. It features a three-pronged locking mechanism ensuring secure lens attachment.
Various FD lens iterations exist, including standard, New FD (SSC), and FL. Adapters allow using FD lenses on modern digital cameras, preserving their optical quality. Understanding these variations aids in lens selection and compatibility.
FD Mount Lens Variations
Canon FD lenses evolved through three main iterations: R, FL, and New FD (SSC). Early ‘R’ lenses lacked aperture control on the camera body. ‘FL’ lenses added semi-automatic aperture, while ‘New FD’ (SSC – Super Spectral Shift Coating) offered full electronic communication.
SSC lenses provide superior metering and aperture priority functionality with the AE-1. Identifying these variations is crucial for maximizing compatibility and utilizing the camera’s features effectively.
Adapting FD Lenses to Modern Cameras
Adapting Canon FD lenses to mirrorless systems like Sony E-mount or Fujifilm X-mount is popular. Adapters allow retaining FD lens quality on newer bodies, but often introduce limitations.
Full electronic control (aperture, autofocus) isn’t typically achievable; manual control prevails. Adapter quality impacts performance – seek reputable brands. Consider potential flange distance issues and image quality variations when choosing an adapter;
Resources for Canon AE-1 Users
Numerous online forums and communities cater to Canon AE-1 enthusiasts, offering support, advice, and repair information. Websites like Canon Camera Museum provide historical context and documentation.
Finding replacement parts can be challenging, but specialized repair services exist. Online marketplaces often list used AE-1 bodies and FD lenses. Dedicated Facebook groups and photography forums are excellent places to connect with fellow users.
Online Forums and Communities
Canon AE-1 users benefit greatly from vibrant online communities dedicated to this classic camera. These forums provide a platform for asking questions, sharing experiences, and troubleshooting issues.
Dedicated Facebook groups and photography-specific forums, like those on Reddit (r/analog) and Photo.net, are invaluable resources. Members often share repair tips, lens recommendations, and examples of their work, fostering a collaborative learning environment.
Repair Services and Parts Availability
Despite its age, the Canon AE-1 remains surprisingly well-supported with repair services and parts. Several specialized camera repair shops still service these cameras, offering CLA (Clean, Lube, and Adjust) services.
Parts, including light seals, foam, and even some electronic components, are available from online retailers like eBay and specialized camera parts suppliers. However, finding qualified technicians is crucial for complex repairs, ensuring the camera’s longevity.