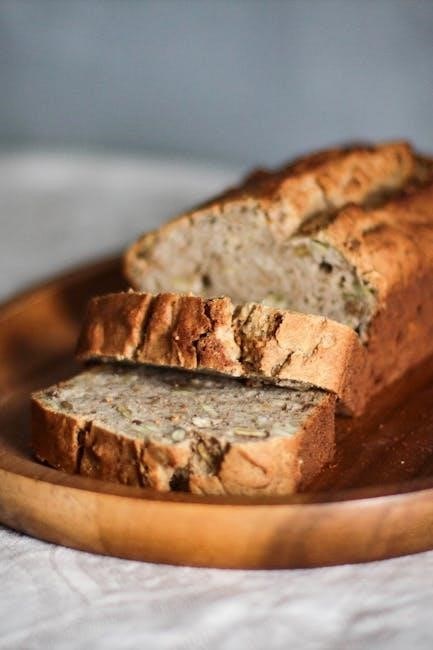
Welcome to the Wyse Guide Sourdough Bread, a simple yet rewarding recipe designed for both beginners and experienced bakers. This bread offers a golden, crisp crust and a light, airy crumb, made possible by an overnight sourdough starter. With minimal hands-on work and no need for autolyse or preferment, this recipe is perfect for those seeking a hassle-free baking experience. Follow Kaleb Wyse’s expert guidance to create a delicious, homemade sourdough loaf that’s sure to impress.
Importance of Sourdough Starter
The sourdough starter is the heart of this bread recipe, responsible for its distinctive flavor and rise. Acting as a natural leavening agent, it ferments the dough, creating a tangy taste and airy texture. Unlike commercial yeast, a sourdough starter adds complexity and depth, making the bread uniquely delicious. Its overnight method simplifies the process, reducing effort while maintaining quality. This traditional approach ensures a authentic sourdough experience, perfect for bakers of all skill levels.
2.1 What is a Sourdough Starter?
A sourdough starter is a naturally occurring mixture of wild yeast and bacteria that ferments sugars in dough, acting as a leavening agent. It is created by allowing a simple mixture of flour and water to sit, which attracts wild yeast and lactic acid bacteria from the environment. Over time, this mixture becomes a bubbly, active culture that can be used to rise bread without commercial yeast.
The starter is alive and must be fed regularly with more flour and water to maintain its health and activity. When properly cared for, it becomes a reliable and consistent tool for baking sourdough bread. The fermentation process involving the starter produces lactic acid, which gives sourdough its characteristic tangy flavor and chewy texture.
The sourdough starter is a key component in the Wyse Guide recipe, as it simplifies the bread-making process while delivering authentic results. By using an overnight starter, the recipe reduces the effort typically associated with traditional sourdough methods, making it accessible to bakers of all skill levels. This natural leavening method ensures a flavorful and aromatic loaf that stands out from bread made with commercial yeast.
In essence, a sourdough starter is a natural, living ingredient that transforms flour and water into a delicious, crusty bread. Its unique properties make it a cornerstone of artisanal baking, and its versatility allows for endless creativity in the kitchen. Whether you’re a seasoned baker or just starting out, understanding and working with a sourdough starter is a rewarding experience that elevates your bread-making skills.
2.2 Benefits of Using a Sourdough Starter
Using a sourdough starter offers numerous benefits that make it a preferred choice for many bakers. One of the most significant advantages is the unique flavor it imparts to bread. The natural fermentation process involving wild yeast and lactic acid bacteria creates a tangy, slightly sour taste that is impossible to replicate with commercial yeast. This distinctive flavor is a hallmark of sourdough bread and a major reason why it has gained such popularity worldwide.
Another benefit of using a sourdough starter is its ability to break down phytates, naturally occurring compounds in grains that can inhibit nutrient absorption. This makes sourdough bread easier to digest and potentially healthier for those with sensitive stomachs or dietary restrictions. The longer fermentation time also contributes to a lower glycemic index, making it a better option for people managing blood sugar levels.
The sourdough starter is also incredibly cost-effective. Once established, it requires only flour and water to maintain, eliminating the need to purchase commercial yeast repeatedly. This makes it a sustainable and economical choice for bakers. Additionally, the starter can be used for various recipes beyond bread, such as pancakes, waffles, and even desserts, adding versatility to your baking repertoire.
For beginners, the sourdough starter simplifies the bread-making process. It eliminates the need for precise measurements of commercial yeast, allowing for a more forgiving and flexible approach. The overnight fermentation method used in the Wyse Guide recipe further reduces hands-on effort, making it accessible to those with busy schedules.
Lastly, baking with a sourdough starter connects you to a centuries-old tradition of bread-making. It’s a rewarding experience that combines science and art, allowing you to create something truly unique and delicious. Whether you’re a seasoned baker or just starting out, the benefits of using a sourdough starter make it a valuable tool in your kitchen.
2.3 Maintaining Your Sourdough Starter
Maintaining a sourdough starter is a straightforward process that requires regular attention to keep it healthy and active. The starter is a living entity, relying on a consistent feeding schedule to thrive. Typically, you should feed your starter once a day, using a 1:1:1 ratio of starter, flour, and water by weight. For example, if you have 100 grams of starter, you would add 100 grams of flour and 100 grams of water. This routine ensures the starter remains bubbly, frothy, and aromatic, indicating it’s ready to leaven your bread.
When not in use, the sourdough starter can be stored in the refrigerator to slow down its activity. During this time, it only needs to be fed once a week. Before baking, simply remove the starter from the fridge, let it come to room temperature, and feed it once or twice to reactivate it. This flexibility makes it easy to maintain even for those with busy schedules.
Signs of a healthy sourdough starter include a tangy aroma, visible bubbles on the surface, and a light, airy texture. If your starter becomes too active or starts to overflow, it may need more frequent feeding or a larger container. Conversely, if it appears sluggish, it might need a refresh or a warmer environment to stimulate activity. A healthy starter should double in size within a few hours after feeding, indicating it’s ready to use in your dough.
One of the most rewarding aspects of maintaining a sourdough starter is its versatility. It can be used not only for bread but also for pancakes, waffles, and even desserts. Over time, your starter will develop its own unique characteristics, making your baked goods truly one-of-a-kind. With proper care, your sourdough starter can last for years, becoming a trusted companion in your baking journey.
Remember, consistency is key. Stick to a feeding schedule, monitor your starter’s behavior, and adjust as needed. Whether you’re baking daily or occasionally, maintaining your sourdough starter is a simple yet rewarding process that ensures you always have a reliable leavening agent on hand.
Ingredients and Equipment
The Wyse Guide Sourdough Bread requires simple, high-quality ingredients: bread flour, water, salt, and an active sourdough starter. These basics ensure a traditional flavor and texture; Essential equipment includes a large mixing bowl, a dough scraper, a Dutch oven or baking vessel, and a wire rack for cooling. Optional tools like a stand mixer or bench scale can streamline the process, but are not necessary. This approach keeps baking accessible and enjoyable for home bakers of all levels.

3.1 Essential Ingredients for Sourdough Bread
The Wyse Guide Sourdough Bread recipe relies on four fundamental ingredients: bread flour, water, salt, and an active sourdough starter. These components work together to create a bread that is both flavorful and textured. Below is a detailed breakdown of each ingredient and its role in the bread-making process.

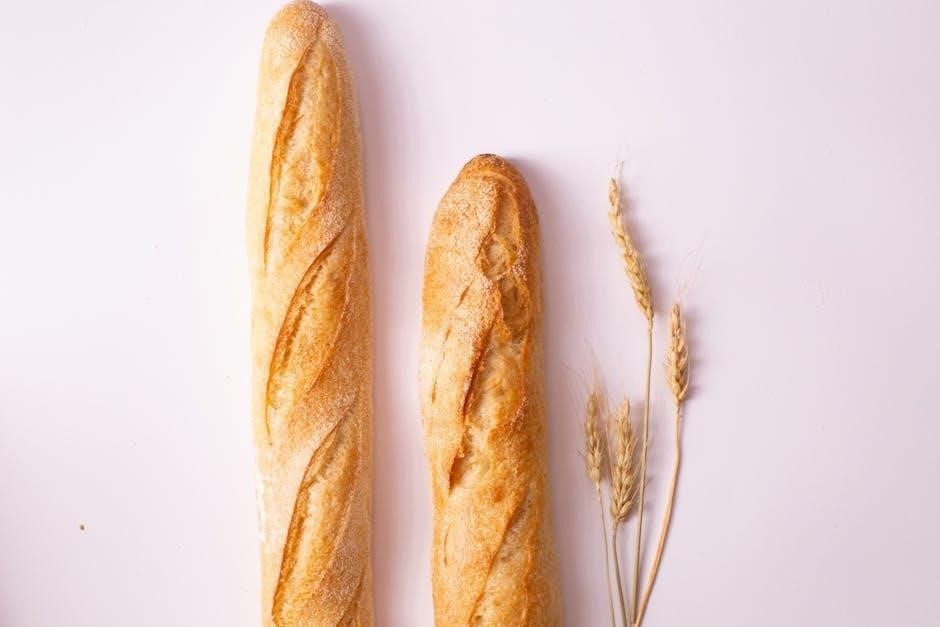
- Bread Flour: Bread flour is the foundation of sourdough bread. It contains a higher protein content than all-purpose flour, typically between 12-14%, which is essential for developing the gluten that gives the bread its structure and chew. Look for unbleached, unbromated bread flour to ensure the best flavor and texture.
- Water: Water hydrates the dough and plays a crucial role in the fermentation process. Use filtered or tap water, but avoid chlorinated water, as it can inhibit the activity of the sourdough starter. The water should be at room temperature to promote even fermentation.
- Salt: Salt enhances the flavor of the bread and acts as a natural preservative. It also helps control the fermentation process by slowing down the activity of the sourdough starter. Use a high-quality, unrefined salt, such as sea salt or kosher salt, for the best results.
- Sourdough Starter: The sourdough starter is the heart of this recipe. It is a naturally occurring mixture of wild yeast and bacteria that ferments the sugars in the dough, producing lactic acid and giving the bread its characteristic tangy flavor. The starter must be active and bubbly before use to ensure proper fermentation.
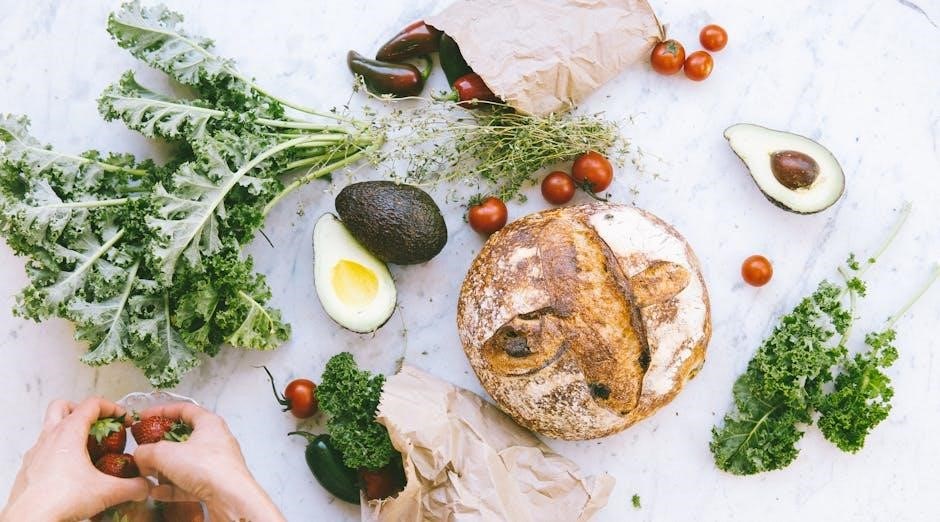
In addition to these core ingredients, some recipes may include optional additions, such as honey or oats, to create variations like honey oat sourdough. These ingredients can enhance the flavor and texture but are not essential for the classic version. Always use fresh, high-quality ingredients to achieve the best results.
By focusing on these simple, high-quality ingredients, the Wyse Guide Sourdough Bread recipe ensures a traditional, authentic sourdough experience that is both delicious and rewarding to make.
3.2 Necessary Equipment for Baking Sourdough
Baking sourdough bread requires specific equipment to ensure the best results. While some tools are essential, others can enhance the process and make it more efficient. Below is a list of the necessary equipment for baking sourdough bread, as outlined in the Wyse Guide.
- Mixing Bowls: A large, clean mixing bowl is needed to combine the dough ingredients. Stainless steel or glass bowls are ideal because they are easy to clean and maintain. Avoid using plastic bowls, as they can retain odors and bacteria.
- Dutch Oven or Loaf Pans: Baking the bread in a Dutch oven is a popular method, as it creates a crispy crust and a well-cooked interior. If you prefer a more traditional loaf shape, use two large loaf pans or a combination of medium and small pans. Ensure the pans are greased or lined with parchment paper to prevent sticking.
- Instant-Read Thermometer: An instant-read thermometer is crucial for determining when the bread is fully baked. The internal temperature of the bread should reach 200°F (90°C) for a perfectly cooked loaf. This tool ensures you don’t underbake or overbake the bread.
- Wire Rack: After baking, the bread needs to cool completely on a wire rack. This allows air to circulate around the loaf, preventing the crust from becoming soggy. Cooling the bread for at least four hours before slicing is recommended for the best texture.
- Measuring Tools: Accurate measurements are key to successful sourdough bread. Use a digital scale to measure flour, water, and salt precisely. A set of measuring cups and spoons can also be useful for smaller quantities.
- Dough Scraper or Spatula: A dough scraper or spatula is handy for mixing and handling the dough. It helps incorporate ingredients evenly and prevents the dough from sticking to the bowl or your hands.
- Stand Mixer (Optional): While not required, a stand mixer with a dough hook attachment can simplify the mixing process, especially for beginners. However, many bakers prefer to mix the dough by hand for better control.
Having the right equipment ensures that each step of the sourdough bread-making process is executed smoothly. From mixing to baking and cooling, these tools help achieve the perfect balance of flavor, texture, and appearance. With the Wyse Guide, you’ll be well-equipped to create delicious, homemade sourdough bread that rivals professional bakeries.
Step-by-Step Process
The Wyse Guide Sourdough Bread recipe offers a straightforward, step-by-step approach to baking delicious homemade sourdough. Begin by mixing the dough ingredients, including your active sourdough starter, flour, water, and salt, until just combined. Allow the dough to rest and proof overnight, developing its signature tang. Shape the dough gently, then bake in a preheated Dutch oven or loaf pans until golden and crispy. Cool completely on a wire rack before slicing. This simple process yields a crusty, flavorful loaf with minimal effort.
4.1 Mixing the Dough
Mixing the dough is the first and most crucial step in creating Wyse Guide Sourdough Bread. This process sets the foundation for the bread’s texture and flavor. Begin by combining 360 grams of water, 12 grams of salt, and 100 grams of your active sourdough starter in a large mixing bowl. Add 500 grams of bread flour and mix until just combined, ensuring no dry spots remain. Avoid overmixing, as this can lead to a dense loaf.
Using a stand mixer with a dough hook attachment or mixing by hand, gently fold the ingredients until they form a shaggy dough. Cover the bowl with a damp cloth and let it rest for 20-30 minutes to allow the flour to absorb the water. After the rest, perform a series of gentle folds to develop the dough’s structure. This step is essential for creating a light, airy crumb and a chewy crust.
Once the dough comes together, transfer it to a lightly oiled bowl, cover it with plastic wrap or a clean towel, and let it proof in a warm, draft-free place. The initial proofing stage typically takes 4-6 hours, during which the dough will double in size. Be patient, as this step is vital for developing the bread’s signature tang and rise. After proofing, the dough is ready to be shaped, marking the next step in the Wyse Guide Sourdough Bread recipe.
Remember, the key to a successful mix is to keep the process gentle and brief. Overworking the dough can destroy the delicate balance of the sourdough starter’s natural yeast and bacteria, leading to a less flavorful and less textured loaf. By following these simple steps, you’ll be well on your way to crafting a delicious, homemade sourdough bread that rivals store-bought varieties.